The first time I changed my motorcycle brake pads, I was a little bit tense about whether I could do it or not. However, after watching a lot of videos and talking to some motorcycle mechanics, I trusted myself to do it.
I changed my motorcycle’s front brake, which is a single disk brake. It also has ABS. When you change your motorcycle brake pads, you must have a pair of brake pads ready. Only change your motorcycle brake pads when you are in a critical situation; otherwise, do not.
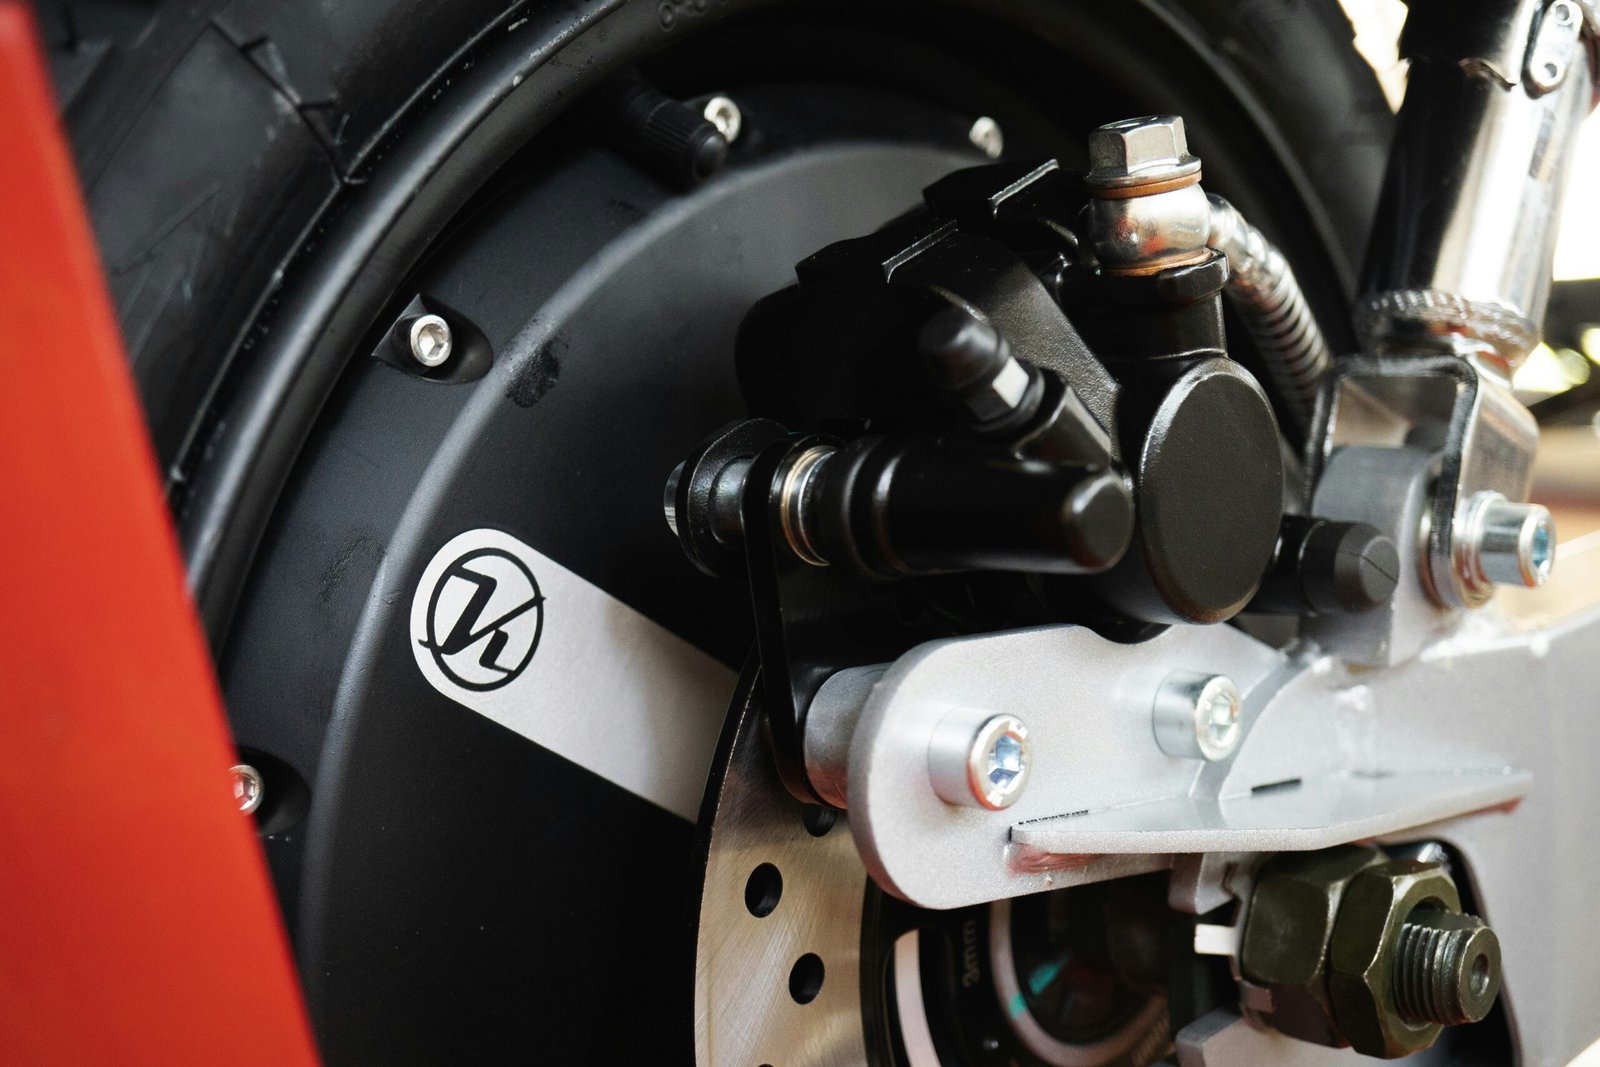
First, check how your motorcycle brake looks. From the current angle, you should be able to get a clear view of the pads where they contact the disk.
Some pads will have a groove in them to help monitor. If there is less than two millimeters of friction material, you need to change the brake pads.
What Instruments Are Needed to Change My Motorcycle Brake?
- Some hand tools to remove the fluid reservoir, caliper, and pads
- An old toothbrush
- Some soapy water for cleaning the caliper
- Some nitrile gloves
- Some brake cleaner
- Isopropyl alcohol and a Scotch-Brite pad for cleaning the disk
- Plenty of rags
First, I stand my motorcycle on a single stand, but if you have a double stand, always use the double stand. Then, disconnect the wire of the ABS sensor by hand. If your brake pads are retained with a threaded pin or plug, go ahead and loosen it while the caliper is still firmly attached to the fork. Sometimes, those bolts are pretty corroded, so feel free to apply a penetrating lubricant and give it time to work.
Then, unbolt the caliper from the bike and take some pictures of it from a few angles; there are a lot of pieces. After you disassemble this, these pictures will help you reassemble it. This always helps me with these instruments.
Once the caliper is off the bike, it’s really important that you don’t accidentally pull the brake lever, as that could pop the pistons out and cause all sorts of problems. An easy solution is to simply hang a rag over the brake lever as a reminder.
After the pad retaining hardware is loose and the caliper is off the bike, fully remove the pad hanger pin. At this point, the pads should just slide out the top or bottom of the caliper body.
Note: Some brake pads might have shim plates or insulators on the back of the brake pads. These can serve to reduce heat transfer, vibration, and noise. Some bikes have them, and some do not. Some aftermarket brake pads won’t even fit into the caliper with the shims installed, so don’t feel obligated to use them.
Set all the retaining hardware aside and take a look at your brake pads. The friction material should be evenly worn across the surface. If that looks good, then look at your disk and inspect it for cracks, gouges, or other damage. If the surface is obviously worn or there is a ridge along the swept area, measure the disk thickness to ensure it’s still within spec. The disk will have its minimum thickness written somewhere on it.
I also clean the disk with a Scotch-Brite pad to remove any brake residue. It’s very important to clean the disk. Then, use a clean rag with either brake cleaner or isopropyl alcohol to give it a final wipe down.
Now, look at the caliper. As your brake pads wore down, the pistons extended out and will need to be pushed back in to accommodate thicker brake pads. However, the pistons are often covered with dirt, so if you push the piston, it might damage the piston seals. So, I clean them with detergent like Simple Green or soapy water and a soft brush.
It is most important to keep your brakes working well for a long time.
If the pistons are deeply pitted or corroded, you are going to need to replace them. Also, if you find the piston seals are bulging or leaking, that is another sign to replace them.
When I push the piston caliper, I push one piston, but the other piston might pop out, so be careful. Try to push both pistons at the same time (I also use an old brake pad and a screwdriver to push them simultaneously).
After that, I put in the new brake pads and prefer to keep everything dry. So, go ahead and put everything back together. Make sure the pads and spring plates are in place, and the retaining hardware is properly installed. Then, with the caliper pads spread, slide the caliper back into position on the disk, install the bolts, and tighten everything properly. Then, my bike is ready to ride.
Every rider should know about this; it can help you solve this problem in difficult situations.